Contents
- Where you are starting from: three different baselines
- A beginner cycling training plan: consistency before intensity
- How far that is and how much you need to eat
- Heart rate and feel instead of watts
- Bike fit: what to set yourself and when to see a specialist
- Clipless pedals: what to expect
- Group riding: what you gain and how to ride safely
- Where to ride
- Basic technique that a watch does not teach
- What to buy and in what order
- What it costs: categories instead of a price list
- The most common first-year mistakes
- When to ask for help
- Frequently asked questions
Where you are starting from: three different baselines
The plan depends on what you lack today: fitness, skills or equipment.
| Starting point | What you have | What is missing | First goal |
|---|---|---|---|
| No sport for years | Motivation, often an ordinary bike | Load tolerance, the habit, comfort in the saddle | Three easy rides a week for several weeks in a row |
| Another sport, such as running | Fitness, the training habit | Technique, position, leg strength on the bike, riding in traffic | Riding easy even though your heart and lungs can do more |
| Leisure riding, a new road bike | Kilometers, confidence on the bike | Structure, group riding, pedals | A longer ride without fading at the end |
With heart disease, diabetes, high blood pressure or after a serious injury, talk to a doctor before you start regular training. The same applies to chest pain, dizziness or shortness of breath during effort.
Runners face a trap of their own here. The heart and lungs are ready, but the tissues are not used to hours spent in one position. Instead of running out of breath, you get pain in the neck, wrists and sit bones.
A beginner cycling training plan: consistency before intensity
The plan for a first season fits in one sentence: ride often, easy and gradually longer.
An easy pace on a bike is harder than it sounds. Descents, traffic lights and gusts of wind keep changing your power, and most people ride every route at the same moderately tiring intensity. After a while that stops bringing improvement. The most important habit of the season is being able to ride slowly.
| Stage | What the aim is | Rough numbers | When to move on |
|---|---|---|---|
| Getting used to it | The habit, sitting, starting and braking | 2–3 rides a week, 30–60 minutes | Riding does not hurt and you want to get back on the next day |
| Building | A longer ride without a bad patch, the first climbs | 3 rides, 3–5 hours in total, one of them longer | You finish the longer ride without being exhausted |
| Adding structure | The first short harder efforts, eating on the bike, riding with others | 3–4 rides, 4–7 hours in total | You complete one harder effort and still finish the ride comfortably |
These are our editorial reference points, not rules from research. How fast you move between stages depends on age, your history of activity, sleep and work. Every few weeks take a lighter week, even if you feel great, because tendons and sit bones adapt more slowly than the heart.
What to do after two weeks off
Don't try to catch up. In recently trained people VO2max falls by 3.6–6% after 2–4 weeks without training. You will feel it, but the fitness does not vanish. Start with a lighter week and carry on. Once easy riding has become routine, the next step is a structured season, described in road cycling training plans.
How far that is and how much you need to eat
In the first season count time, not distance. Average speed depends on wind, traffic lights and terrain. The table, our reference point for easy riding, helps you plan the route, the drinking and the eating.
| Riding time | At 20 km/h (12.4 mph) | At 25 km/h (15.5 mph) | Water | Food |
|---|---|---|---|---|
| 1 hour | 20 km (12 miles) | 25 km (16 miles) | One bottle, more in the heat | Usually nothing |
| 2 hours | 40 km (25 miles) | 50 km (31 miles) | 1–2 bottles | A bar or a banana |
| 3 hours | 60 km (37 miles) | 75 km (47 miles) | 2 bottles, a refill on the way | 30–60 g of carbohydrate per hour |
| 4 hours | 80 km (50 miles) | 100 km (62 miles) | 3 bottles or a shop on the route | 30–60 g of carbohydrate per hour |
A banana is about 25 g of carbohydrate, a cereal bar is similar, and a 500 ml bottle of sports drink about 30 g. For 3 hours at 35 g an hour you need about 105 g, for example a bottle of drink and three bananas. Eat every 20–30 minutes, before you feel hungry.
Before a longer loop, check the wind. Ride into it at the start and come home with a tailwind.
Heart rate and feel instead of watts
You do not need a power meter in the first season. A watch with heart rate is enough, and often so is a simple self-check that costs nothing.
The talk test
On an easy ride you speak in full sentences. That is how Andrew Coggan describes the easy endurance ride, level 2 in his system: continuous conversation is possible, and one level up it starts to break. When you answer in single words, you are riding too hard for base training. The method works in any terrain and needs no equipment.
How to use heart rate
- Don't react to every beat. Heart rate responds to a change in effort with a delay, so it will not show straight away that you have sped up.
- Don't compare yourself with others. The same heart rate in two people can mean different things.
- Allow for the day. Stress, sleep, caffeine, heat and fatigue change the reading.
- Don't trust formulas blindly. An age-based formula is an approximation and can be far off for a particular person.
It is better to calculate zones from threshold heart rate (LTHR) than from maximum heart rate. You find it in a 30-minute effort at an even, hard pace: you take the average heart rate of the last 20 minutes. It is a hard effort, so do it after several weeks of regular riding and only when you are fully healthy.
At IMI the zones are set by a coach after the tests and your first workouts. Without a power meter the coach builds the plan on heart rate, and data from Garmin or Apple Watch reaches the app automatically.
When to think about a power meter
A power meter starts to make sense when you want to compare efforts over time, train with intervals or prepare for a specific event. Single-sided meters, which measure one leg and double the result, are the cheapest way in. Dual-sided pedals and cranksets cost more. In the article on road cycling training plans we explain how power and heart rate work together in the different phases of the season.
Bike fit: what to set yourself and when to see a specialist
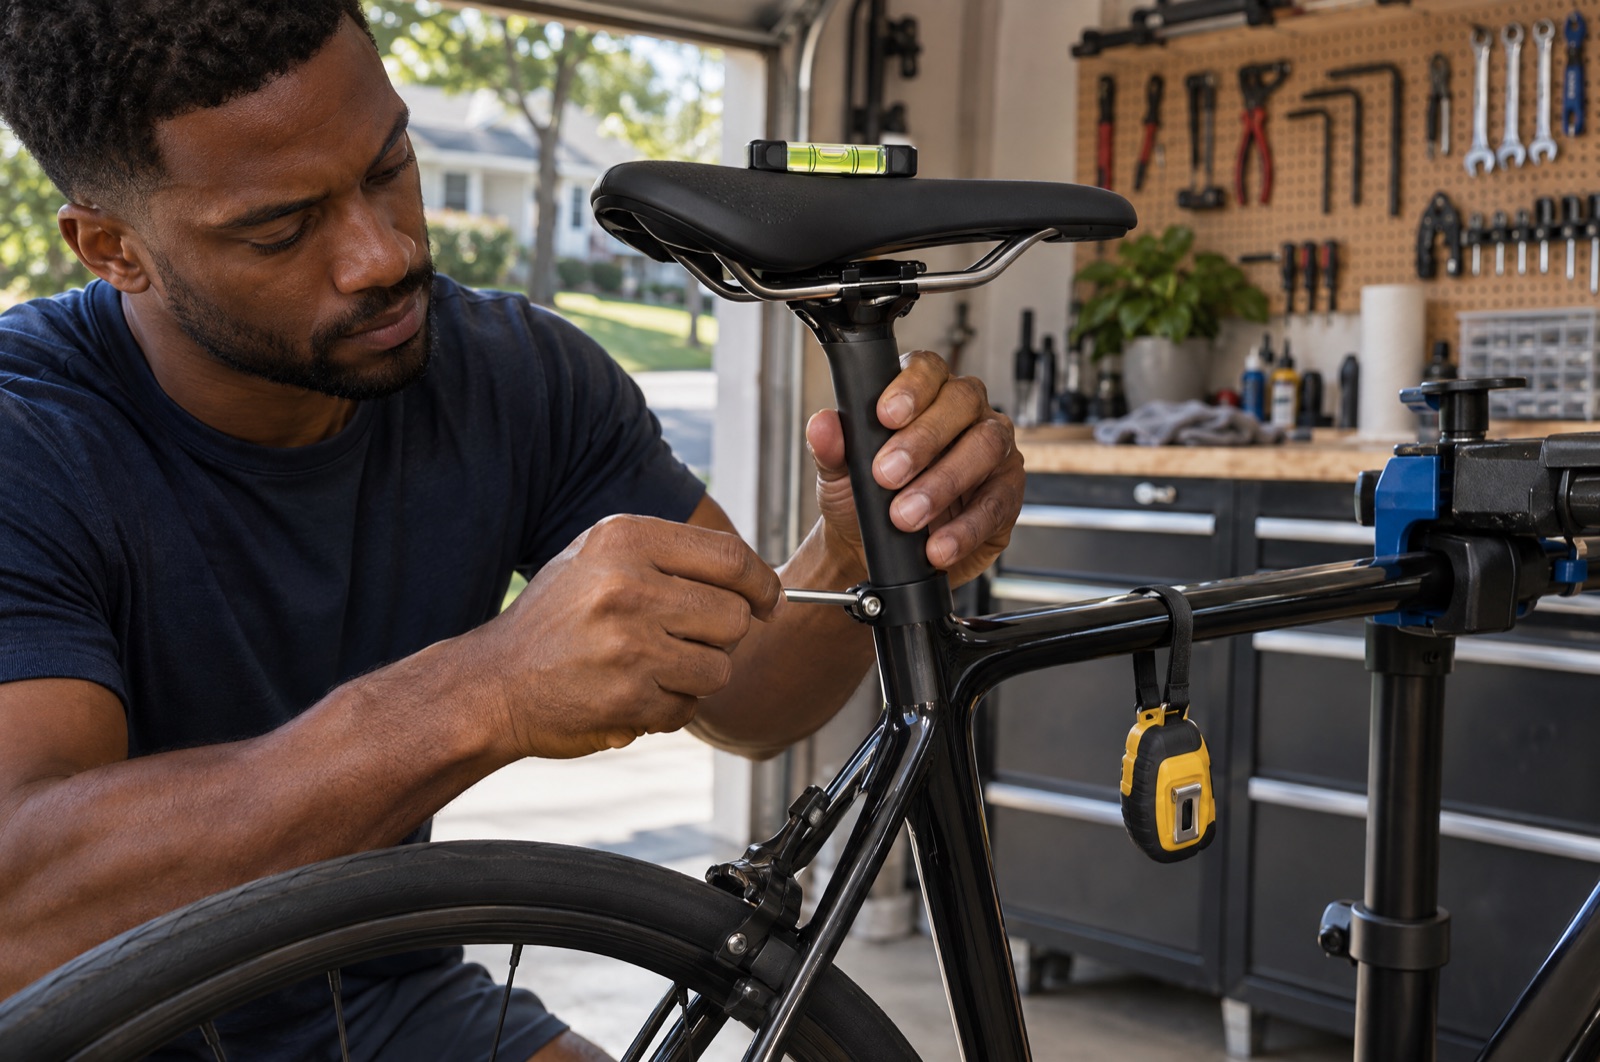
A bike fit is the adjustment of the bike to your body so that riding does not hurt. Even professionals have complaints: in a 2010 study, 58% of professional road cyclists reported lower back pain in the previous 12 months and 36% reported pain at the front of the knee. A 2011 review states that overuse knee pain affects 50% of cyclists.
Saddle height
This is the most important single setting. A review of studies identified knee flexion of 25–30° with the pedal at its lowest point as the range that may reduce the risk of knee injury and oxygen consumption.
An older rule of thumb, the Hamley and Thomas method, gives 109% of inseam length, measured from the pedal axle at its lowest point to the top of the saddle. For an 80 cm (31.5 in) inseam that is 87.2 cm (34.3 in). Methods like this are imprecise, though: in a 2005 study of 19 cyclists, even the most accurate of the simple methods put the knee in the target range of 25–35° only about 70% of the time. The formula is only the start of the adjustment.
| Symptom | Possible cause | What to check first |
|---|---|---|
| Pain at the front of the knee | Saddle too low or too far forward | Saddle height and fore-aft position |
| Pain at the back of the knee | Saddle too high | Saddle height, hips rocking |
| Sore hands and wrists | Too much weight on the handlebars | Position of the brake hoods, wrist angle, grip |
| Neck pain | Cockpit too low or too far away | Stem height and length |
| Genital numbness | Shape or angle of the saddle | Saddle angle and width, the pad in your shorts |
These are first steps, not a diagnosis. Pain that does not go away after a small change needs a physiotherapist or a doctor. Change one setting at a time and by a few millimeters. In a professional fit, too, most corrections are a matter of millimeters.
When to pay for a fit
For leisure riding without pain you do not need a fit. Consider it when pain appears, when you start training hard and before you buy a new bike.
That last case pays off most, because no adjustment will fix a frame of the wrong size. A sizing consultation before the purchase is usually a shorter and cheaper service than a full fit.
Ask for documentation and check whether the price includes corrections after the visit. A session lasts from 1 to 5 hours, depending on the scope of the service.
Clipless pedals: what to expect
Clipless pedals, meaning SPD, SPD-SL and their equivalents, connect the shoe to the pedal through a cleat. You release by twisting your heel outward. The name is confusing: it refers to the absence of the old toe clips, not to the absence of clipping in.
| Two-bolt system (for example SPD) | Three-bolt system (for example SPD-SL, Look) | |
|---|---|---|
| Cleat | Small, usually recessed in the sole | Large, protrudes from the sole |
| Walking | Comfortable | Awkward, slippery on tiles |
| Who it suits | Commuting, touring, gravel, beginners | Road riding and longer rides at a fast pace |
| Clipping in | Often double-sided | Usually single-sided |
Will the pedals give you more power?
Less than the sales pitch says. In a 2008 study, the type of shoe-pedal connection alone did not significantly change efficiency or muscle activity during moderate riding. The group was small, and the results apply to steady riding, not sprints.
Pulling up on the pedal during steady riding does not help either. In a 2007 study mechanical effectiveness went up, but efficiency fell from 20.2% to 19.0%. In a 2008 paper net efficiency fell by about 9% in elite riders and by 3.3% in non-cyclists. What clipping in does give you is security, a stable foot and control of the bike, especially when riding faster.
How to learn to clip in without falling
- Fit the cleats in the middle of their adjustment range and set the release tension to the minimum.
- Lean against a wall or a door frame and clip in and out a dozen times or more with each foot.
- Go to an empty parking lot and practice setting off, stopping and unclipping the same foot.
- Choose the foot you always unclip first. Unclip it earlier than you think you need to.
- Do your first rides on quiet roads, without signaled intersections and without steep climbs.
The classic fall happens at almost zero speed, when you forget to unclip. It usually ends with a bruise and some embarrassment, but in traffic it can be dangerous. After the first rides, check the cleat position. A foot set at an angle your knee does not like can produce pain after a few weeks.
Group riding: what you gain and how to ride safely
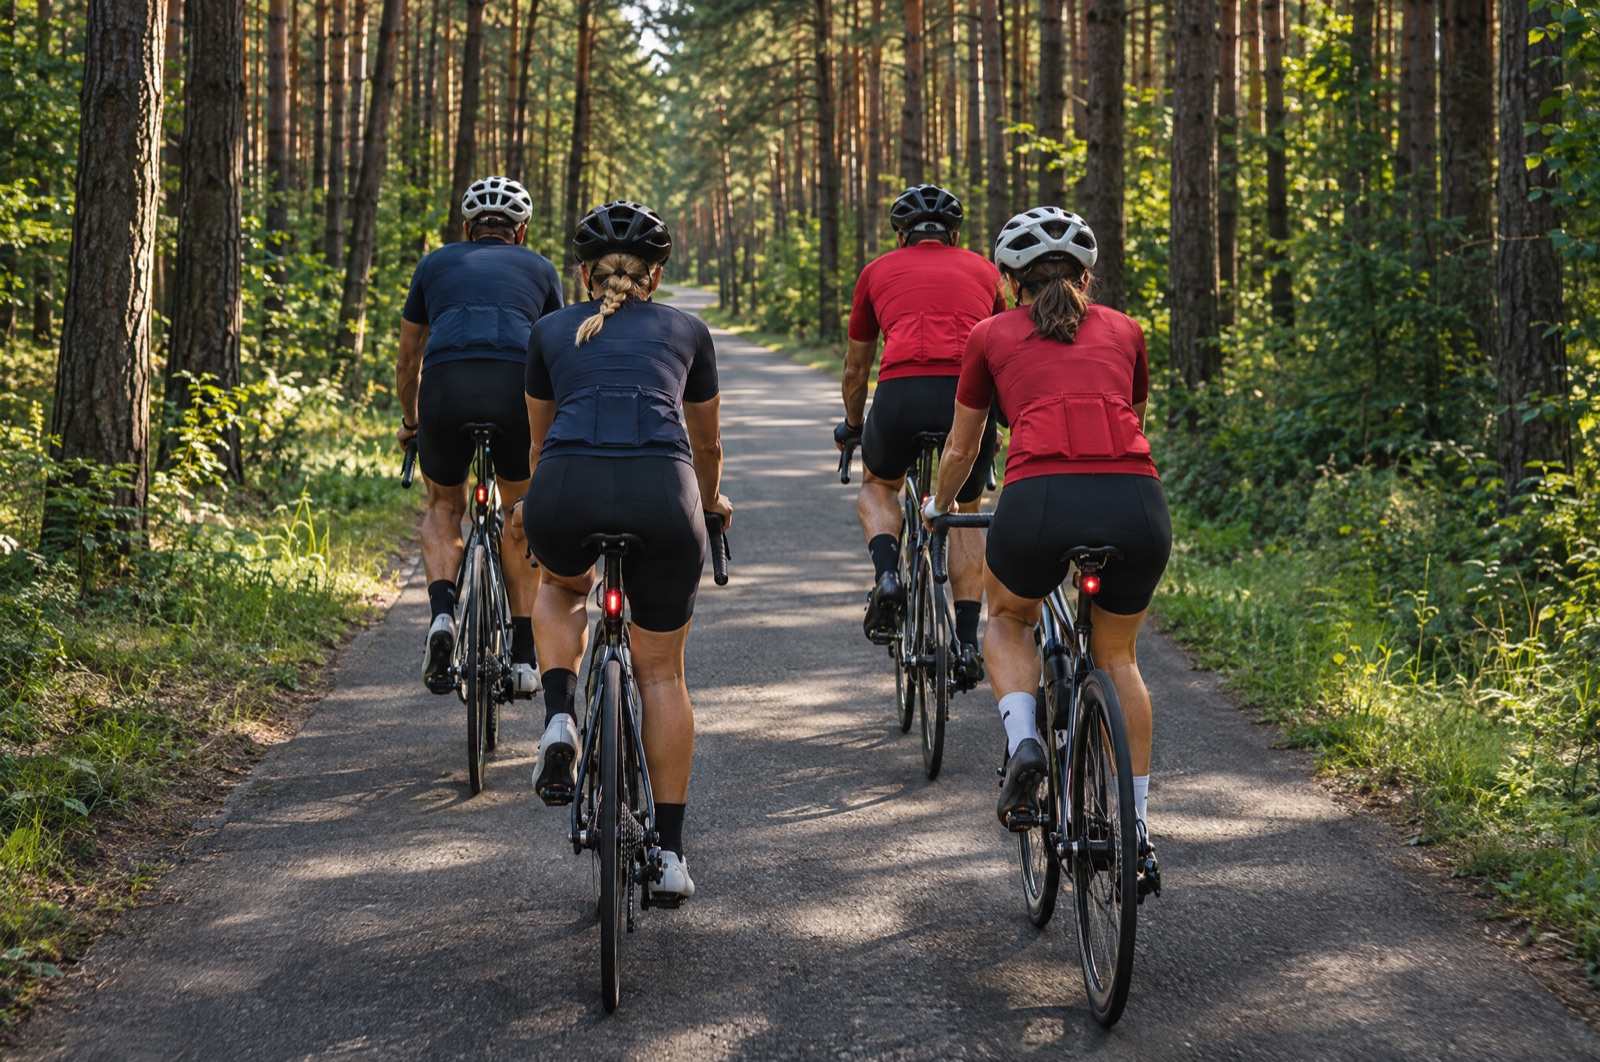
Riding in a group is one of the biggest differences between riding a bike for leisure and cycling as a sport. It raises the pace and takes a skill you cannot practice alone.
| Situation | Effect |
|---|---|
| On the wheel of one rider, 32 km/h (20 mph) | About 18% lower oxygen consumption |
| On the wheel of one rider, 37–40 km/h (23–25 mph) | About 27% lower oxygen consumption |
| At the back of a group of 8, 40 km/h (25 mph) | About 39% lower oxygen consumption |
| Middle and back of a peloton of 121 riders | Air resistance at 5–10% of the value for a lone rider |
The last figure comes from a 2018 simulation. Earlier estimates for small groups put it at 50–70% of the resistance. According to the authors, the drag in the middle and back of the peloton equals riding solo at a speed 3.2 to 4.5 times lower. Our calculation: at 54 km/h (34 mph) that is about 12–17 km/h (7.5–10.5 mph). That does not mean you could keep up with professionals: the climbs, the accelerations and the risk of a crash remain.
The shelter works only at close range: the bigger the gap to the wheel in front, the smaller the benefit. Riding right on a wheel is not a skill to start with, though. Begin with a bigger gap and shorten it as you gain confidence.
Rules that protect everyone
- Ride smoothly. Sudden braking is more dangerous than a slower pace. When you stand up on a climb, the bike moves back for a moment relative to the rider behind you, so do it gently.
- Look further ahead than the rear wheel. Watch the backs of the two or three riders in front of you.
- Keep your hands near the brake levers. Brake progressively, not abruptly.
- Signal. Potholes, stops, changes of line. Point with your hand as well as calling out.
- Don't overlap the wheel in front. If that rider moves across, you are the one who falls.
- Take short turns. A short turn at the front at an even pace is better than a long one after which you drop off the back.
What the law says depends on where you ride
Traffic law for cyclists differs between countries, and in the United States, Canada and Australia between states and provinces. The examples below, checked in November 2026, show how wide the differences are. Read the rules for your own country or state before your first group ride.
- Riding two abreast. The UK Highway Code says you can ride two abreast and that it can be safer to do so, while asking riders to let drivers overtake when it is safe. Western Australia allows two abreast with no more than 1.5 m between the riders. German traffic law permits it only where it does not obstruct traffic.
- Passing distance. The Highway Code tells drivers to leave at least 1.5 m when overtaking cyclists at up to 30 mph (48 km/h) and more at higher speeds. Most US states require at least 3 feet (0.9 m).
- Bike lanes and paths. In the UK cyclists are not obliged to use cycle lanes. In New South Wales you must use a bicycle lane where there is one, unless it is impracticable. In Germany a cycle path is compulsory only where a blue cycle-path sign says so.
- Sidewalks. In the UK you must not cycle on the pavement, which is the British word for sidewalk. In Western Australia riders of all ages may use footpaths unless a sign says otherwise, and pedestrians have right of way.
Ride two abreast only where you have room, and go back to single file when a car approaches.
Where to start
Look for a local club or shop that runs easy rides. Ask directly about the pace and the distance. A good group for a beginner waits at the bottom of descents, and the ride leader announces the route. If you want to practice at home first, see the page about the indoor trainer training plan.
Where to ride
A good route matters more than a good bike. Look for roads with little traffic, not for the shortest connection.
| Type of road | Good for a start? | What to watch out for |
|---|---|---|
| Quiet back roads and country lanes | Yes, the best choice | Potholes, sand or gravel after winter and storms, dogs near farms |
| Regional main roads | Only the calm stretches | Heavy traffic at rush hour, trucks |
| Major highways and trunk roads | No | High speeds and through traffic |
| Bike path or lane beside the road | Depends on the country: compulsory in some places, optional in others | Pedestrians, driveways, poor surfaces |
| Motorways and freeways | Usually banned | Check the local rule before you plan a route across one |
Ride with the traffic, on the side of the road your country drives on. Where there is a usable shoulder, it is often the calmest place to be. Where there is none, hold a steady line near the edge of the lane, far enough out to avoid drains and debris. The best time to head out is early on a weekend morning, when traffic is lightest. Before your first ride, look at the route on a map, because a road suggested by navigation can turn out to be gravel or cobbles.
In a temperate climate the comfortable season for a beginner usually runs from mid-spring to mid-autumn: roughly April to October in the northern hemisphere and October to April in the southern. After that the days get short and the roads turn wet and leaf-covered, and it is time to think about winter. In a hot climate it works the other way around: the cooler months and the first hours after sunrise are your season.
Basic technique that a watch does not teach
Many falls in the first season have nothing to do with fitness. Give a few easy rides to skills.
- Braking. The front brake does most of the stopping, but grabbed too sharply it is dangerous. In an empty parking lot, practice firm, progressive braking with both levers, with your weight shifted back.
- Cornering. Slow down before the corner. Keep the inside pedal up and look where you want to go.
- Shifting. Change gear before the climb, not halfway up, when the drivetrain is under heavy load.
- Riding one-handed. Reaching for the bottle and signaling a turn are safety skills. Practice them on an empty road.
- Looking over your shoulder. The bike tends to go where you look. Practice this before you need it in traffic.
- Your line. Ride predictably. Don't swerve away from the edge and don't dip into every bus bay or gap between parked cars.
- Cadence. At the start many people pedal too slowly, in too hard a gear. A good starting point is an easy gear and about 80–90 revolutions per minute on the flat, and somewhat fewer on a climb. Without a sensor, count the revolutions of one leg for 15 seconds and multiply by 4.
Descents and wet roads
On wet asphalt, brake earlier and more gently. Painted lines, drain covers and leaves are slippery. On a descent the time gain is small and the consequences of a mistake are large, so in your first season don't go looking for the limit.
What to buy and in what order
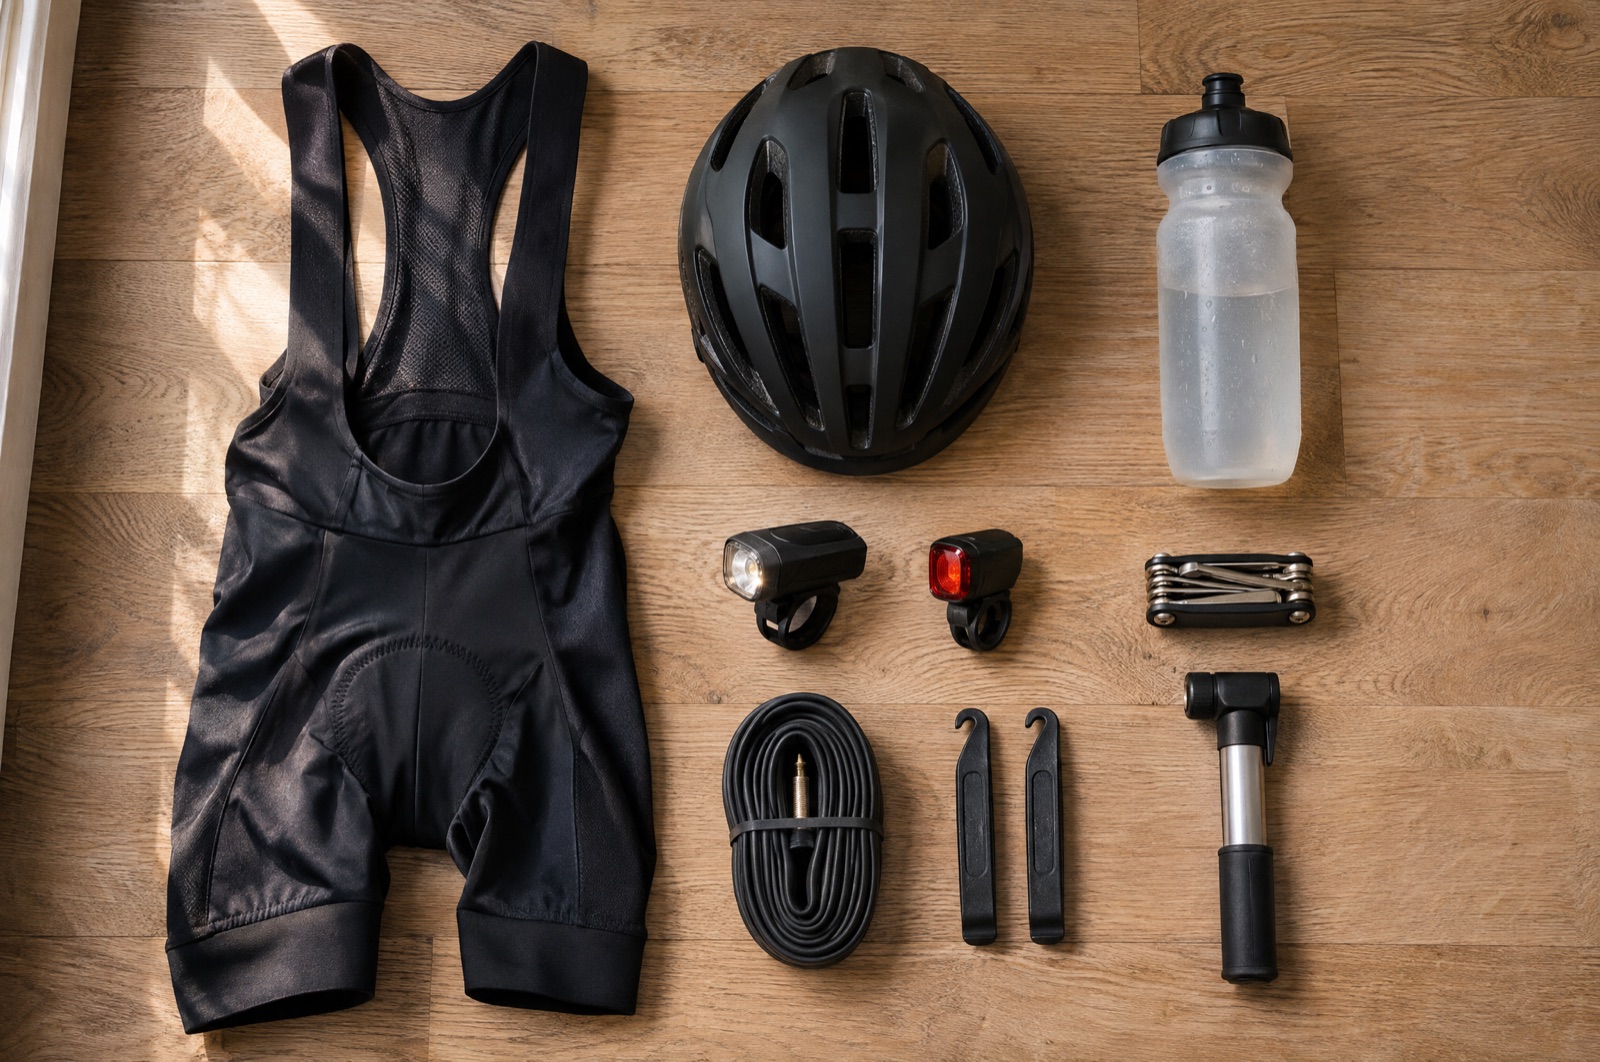
The order of purchases matters more than their price:
- Helmet. The law differs: the UK Highway Code says you should wear one but does not require it, while Western Australia requires an approved, securely fastened helmet for every rider. Whatever the law says, the risk of a fall and a head injury on a public road is real.
- Bike size. More important than the brand and the components. If you can, check it before you buy.
- Padded shorts. The cheapest route to more comfort. Wear them without underwear.
- Lights. Required at night almost everywhere, with details that vary. In the UK a bike ridden at night must have a white front light and a red rear light lit, plus a red rear reflector. Western Australia requires the rear light to be clearly visible from at least 200 m. Check whether your country also requires a bell or extra reflectors.
- Repair kit. A tube, tire levers, a pump, a multi-tool and the skill to change a tube. Learn it at home, not in the rain.
- Bottle and cage. An hour into a ride you will want them.
- Clipless pedals and shoes. They can wait until riding has become a habit.
- Bike computer or heart rate watch. Only when you want to measure progress.
Before every ride check three things: tire pressure (the range is usually printed on the tire sidewall), that both brakes work and that the wheels are tight. It takes a minute, and a loose wheel or a weak brake is among the most dangerous failures on the road.
Choose the bike for the roads around you. Where the back roads are rough or unpaved, a road bike can be the wrong choice: its tires are narrow, while a gravel bike has wider ones and lets you leave the asphalt. You can also spend the first season on the bike you already own, if it works properly and is set up for you.
What it costs: categories instead of a price list
Prices differ too much between countries, currencies and sale seasons for one list to be useful, so the tables show what each category is and whether you need it yet. Compare real prices in your own market on the day you buy.
| Item | Entry level | What more money buys |
|---|---|---|
| Road bike | Aluminum frame, entry-level groupset | Lower weight, a carbon frame, hydraulic disc brakes, electronic shifting. None of it matters as much as the right size |
| Helmet | Any helmet that meets the safety standard used in your country | Lower weight, better ventilation, aerodynamics |
| Padded shorts | A basic pair with a decent pad | Bib straps, a better pad for rides over 3 hours |
| Front and rear lights | Two separate small lights | More light for unlit roads, longer battery life |
| Road shoes and pedals | Entry-level shoes and basic clipless pedals | Stiffer soles, lower weight, finer adjustment |
The bike is by far the largest item in a basic kit. The helmet, shorts, lights and repair kit together come to a fraction of its price. The cheapest bike is not necessarily the best one for you. Size comes first, and a used bike in the right size beats a new one in the wrong size.
Services and extras:
| Item | What it is | Needed in the first season? |
|---|---|---|
| Full bike fit | A session of 1 to 5 hours with a fitter | Only with pain or before an expensive purchase |
| Sizing consultation | A shorter visit to choose the frame size | Worth considering before you buy a bike |
| Simple wheel-on magnetic trainer | The cheapest type of indoor trainer | Optional, if you cannot ride outside in the off-season |
| Direct-drive trainer | Quieter and more accurate, at a higher price | No |
| Training app | MyWhoosh is free, Zwift costs USD 19.99 or EUR 19.99 a month (Zwift price list, December 2025) | Only with a trainer |
Count the running costs too. The chain, brake pads and tires are a recurring expense, and they wear faster in rain and in winter. Check the chain regularly, because a worn one damages the cassette as well. The trainer types are compared in detail in the section on types of indoor trainers.
The most common first-year mistakes
- Increasing distance too fast. The cardiovascular system keeps up. Knees and sit bones do not.
- Riding hungry. Take something to eat on longer rides. A bad patch at the end of the route is often a lack of fuel.
- Buying a bike before checking the size. A wrong frame is hard to fix with a stem.
- Gears that are too hard. On a climb choose an easier gear. Pushing a heavy gear loads the knees for no reason.
- Intervals after two weeks. Hard riding brings quick results, but in the first season consistency gets you a similar gain with less risk.
- Comparing yourself in apps. Different power meters, different wind, different body mass. Compare yourself with yourself.
When to ask for help
You can ride your first season without a coach. Help is useful when you plan your first event, when pain keeps coming back or when you stop improving after a few months. A coach helps most when they stop you from doing too much. If your first event combines sports, see the duathlon training plan or the beginner triathlon training plan.
Frequently asked questions
How much time a week do I need to start cycling?
2–3 rides of 30–60 minutes are enough to start. With consistency, many adults reach 3–5 hours within a few months.
What is a good average speed for a beginner cyclist?
There is no standard. Our planning table uses 20–25 km/h (12–16 mph) for easy riding on flat roads, but wind, hills and traffic lights change it a lot. In the first season count time, not speed, and compare yourself only with your own rides on the same route.
Do I need a road bike to start?
No. You can ride your first season on what you have, if the bike works properly and is the right size. A road bike makes sense when you like asphalt and riding fast.
How long should my first long ride be?
Often 60–90 minutes, long enough to still have strength and control of the bike at the end. Introduce longer rides gradually and remember to eat.
Are clipless pedals dangerous for beginners?
No, as long as you learn to unclip first. The problem is usually the moment of stopping, when you forget to unclip, so practice in a parking lot with the release tension at its minimum. These pedals are not necessary at the start.
When will I be able to ride 100 km?
Many people reach 100 km (62 miles) in their first season, on 3–5 hours a week and a long ride that grows gradually. At 25 km/h that is 4 hours, so first ride 3 hours in comfort and learn to eat on the bike.
Do I have to use the bike lane?
It depends on where you live. In the UK cycle lanes are optional. In New South Wales you must use a bicycle lane where one exists unless it is impracticable, and in Germany a cycle path marked with the blue cycle-path sign is compulsory. Check your local rule.
Can I start cycling in winter?
Yes, but in winter safety matters more than distance. See the advice in the article on winter cycling training.
What should I eat on the bike?
On rides of up to an hour water is usually enough. On longer ones take something with carbohydrate and test what suits you. Don't wait until you are hungry.
When can I enter my first cycling event?
When you regularly finish rides close to the distance of the event and know how to eat on the bike. Before a mass-start event, practice riding in a group.